Skip to main content
WooCommerce Product Management is essential for running a successful online store. When products are well-organized and easy to navigate, your customers will have a better shopping experience — and your sales will grow!
In this guide, you’ll learn:
✅ How to Add and Manage Products
✅ How to Organize Products with Categories and Tags
✅ How to Set Up Product Variations like Size and Color
Adding and Managing Products in WooCommerce
Step 1: Add a New Product
Log in to your WordPress Dashboard.
- Go to Products > Add New.
- Enter the Product Name in the title field.
- Write a Product Description in the editor. This should include key details about the product, its features, and benefits.
Step 2: Configure Product Data
Below the description, you’ll find the Product Data section. This is where you configure pricing, inventory, shipping, and more.
- General Tab
- Set the Regular Price and optional Sale Price
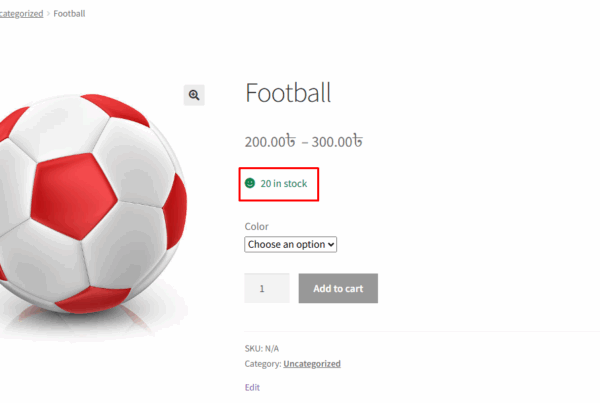
- Inventory Tab
- Add a SKU (Stock Keeping Unit) to track inventory.
- Enable Stock Management if you want WooCommerce to auto-manage your inventory.
- Set the Stock Quantity to allow or disallow backorders.
- Shipping Tab
- Enter the product’s Weight and Dimensions (length, width, height).
- Assign a Shipping Class for specific shipping rates.
- Linked Products Tab
- Upsells: Recommend higher-end alternatives.
- Cross-sells: Suggest related products during checkout.
- Attributes & Variations Tab (for variable products) – More details in the section below.
Step 3: Add Product Images
- Product Image: The main image that represents the product.
- Product Gallery: Additional images showing different angles or features.
Step 4: Publish the Product
After setting everything, click Publish — your product is now live!
How to Use Product Categories and Tags
Proper organization makes it easier for customers to find what they want, and it helps your SEO too!
Adding Product Categories
- Go to Products > Categories.
- Click Add New Category.
- Enter a Category Name and choose a Parent Category if needed.
- (Optional) Add a Description — this is great for SEO.
- Assign categories when adding/editing a product under Product Categories.
Using Product Tags
- Tags act like keywords that describe specific details of your products.
- You can add tags while editing a product in the Product Tags section.
- Tags help customers find related products easily.
💡 Example: If you sell shoes, you can use categories like “Men’s Shoes” and “Women’s Shoes” while using tags like “Running Shoes” and “Casual Wear.”
Setting Up Product Variations and Attributes
If you sell products with different sizes, colors, or other options, you will need to set up Product Attributes and Variations.
Step 1: Add Attributes
- Go to Products > Attributes.
- Enter an Attribute Name (e.g., “Color” or “Size”).
- Click Add Attribute.
- Then, click Configure Terms to add specific values (e.g., Red, Blue, Large, Small).
Step 2: Assign Attributes to a Product
- While editing a product, go to the Product Data section.
- Select Variable Product from the dropdown.
- Under the Attributes tab, select your attribute and click Add.
- Enter attribute values (e.g., Red, Blue) and check “Use for Variations.”
- Click Save Attributes.
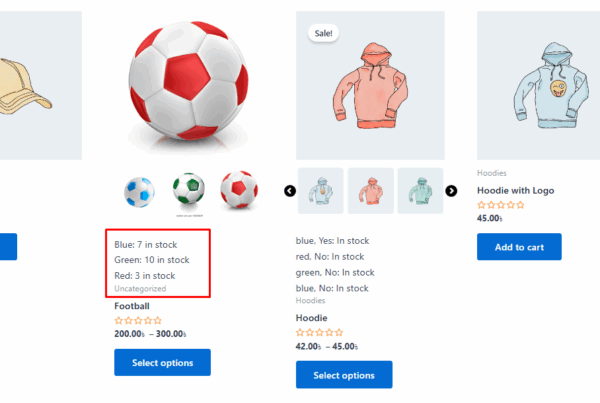
Step 3: Create Product Variations
- Go to the Variations tab and click Add Variation.
- Choose a variation (e.g., Red, Small).
- Set a specific price, stock quantity, image, and SKU for each variation.
- Save your changes.
Now, customers can select variations from a dropdown on the product page.
Final Thoughts
Good product management is the secret behind an easy-to-shop, professional, and high-converting WooCommerce store.
Remember:
- Add clear product names and descriptions.
- Organize with smart categories and helpful tags.
- Offer variations when needed.
- Use attractive product images.
A clean and organized store makes customers happy — and happy customers buy more!
Need help optimizing your WooCommerce store? Contact WooXperto for expert WooCommerce solutions! 🚀